The NanoVNA (Vector Network Analyzer) sometimes written as Nano VNA, is a great tool if you are building or tuning antennas or other RF frequency devices. It will not only show the SWR for a specific frequency like an SWR/Watt meter would, but it will show you the resonant frequencies and their SWR along a range of frequencies. This can be invaluable for tuning an antenna, especially a multi-band antenna like an EFHW (End Fed Half Wave), or when designing and testing other circuits like band pass (BP) or band reject (BR) filters.
The NanoVNA usually costs between $60 – $125 depending on the manufacturer, the functions it provides, the frequency range it covers, any accessories it comes with, and very importantly the screen size.
Recommended Brands and Models
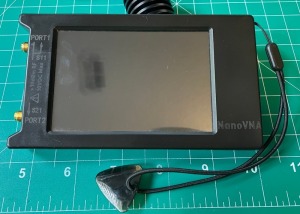
I personally own and love my SEESII NanoVNA H4. It covers from 9KHz – 1.5GHz and has a larger 4 inch touch screen. Seesii is one of the brands you can trust, and it is sold and recommended by both large amateur radio retailers, and Amazon. This model has a 4 inch screen that is much easier to read and use with a stylus. It has a broad coverage range for most use cases. If you want to cover Wi-Fi or higher frequencies, you would need a more expensive model that goes up to 3 GHz. I think this is a great brand and model to get started with. For most people, this will be the only Nano VNA you ever need. If later you decide you need additional coverage or different features, you can always find someone who is looking for a Nano VNA to sell it to so you can upgrade, or you could hold on to it and have 2.
Essential Accessories
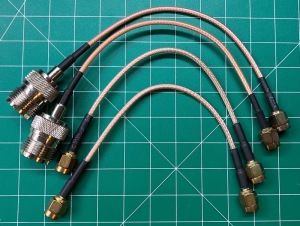
All of the NanoVNAs should come with the absolute essential accessories. These include the Open, Short, Load and Coupling connectors (shown below in the same order) needed to calibrate the NanoVNA before you begin using it.
Most kits will also come with 2 SMA Male to Male cables (the bottom 2 cables in the picture below) to connect the NanoVNA to other devices. There is usually a “guitar pick” style stylus to use on the touch screen attached to the lanyard, and it should come with a power cable (cable only, no power supply) that will allow you to connect the NanoVNA to your computer, and to charge it.
Nice to Have Accessories
There is no end to the list of “nice to have” accessories. I advise you look at your use case(s) and buy the adapters and convertors you are the most likely to need. Since most NanoVNAs have 2 SMA Female connectors, you would probably need some SMA Male to SO-239, SMA Male to N-Type Female, SMA Male to BNC, and possibly some other connectors or convertors for connecting to various antennas or rigs.
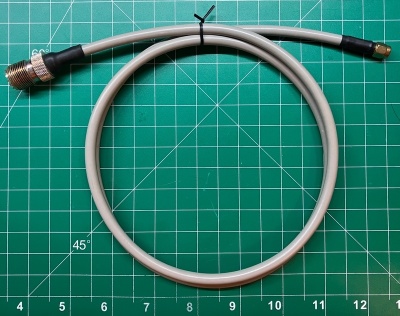
If the item you will be connecting to uses a thick or rigid coax cable, I highly recommend you either make or buy some cables to connect it that have more flex and stress relief to them to avoid putting any stress on the small SMA connectors on the NanoVNA which could damage them or the NanoVNA Board. You can use the very small diameter RG-316, the slightly larger RG-400, or even the medium sized RG-8X will all work fine for these cables. Just make sure you have enough cable to allow the heavier coax to sit so it will not put any strain on the SMA connectors on the NanoVNA. I recommend 3-6 feet if possible. At that short distance, you won’t notice any loss. The picture below is of a cable I made with an SMA Male, SO-239, and RG-8X coax that is 6 feet long to allows me to easily connect my coax coming into the shack to my NanoVNA to test my antennas without putting any stress on the connectors on the NanoVNA.
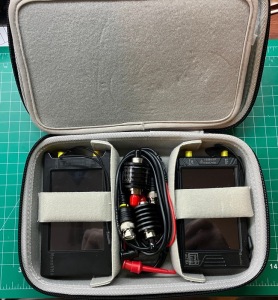
If you plan to carry the NanoVNA with you on outings, I highly recommend getting a case for it to hold everything and to protect it. I currently use the MOSISO Electronic Organizer Travel Case which holds both my NanoVNA and my TinySA along with all my accessories. I can also recommend the FYY Travel Cable Organizer Pouch if that suits your needs better for storage and price range better.
Using the VNA to measure RF output
If you are going to connect the Nano VNA to anything that puts out RF energy, you will most likely need to purchase an attenuator to limit the amount of RF energy that flows into the Nano VNA. Too much RF energy into the Nano VNA can damage or destroy it. I recommend a 40dbm (10 watt) attenuator for anything that can put out 10 watts or less of power (this would cover most HTs). Make sure the attenuator is rated for the frequency range you plan to test and that your VNA supports. To use an attenuator, you simply install it between the source (radio) and the NanoVNA. They, you can adjust the settings of the NanoVNA to tell it how much attenuation you are using, and it will adjust the scale to account for the attenuation.
For more information on how to use the NanoVNA, watch for our upcoming article name Using the NanoVNA. There are also some Kindle eBooks A Guide to the NanoVNA and NanoVNAs Explained: A practical guide to Nano Vector Network Analysers that may also be of interest to you.


